Landscapes: Composition
The foundation of an outstanding landscape photo is a good subject. It doesn’t have to be a majestic mountain range, but there needs to be something special about the scene to capture the viewer’s interest. Upon encountering a promising location, your challenge as a photographer is to interpret and convey what you see in the form of a compelling image. This brings us to the topic of composition.
Composition refers to how the elements of a scene are arranged. Most landscapes have multiple elements, so you need to decide what to emphasize. What is this photo fundamentally about? Often the subject is obvious, but sometimes it may just be a mood or a pattern that you want to capture.
Once you have determined the main theme of the photo you can begin to think about how the various elements in the scene will work together. Like harmonies in a piece of music, the elements should support each other to create a pleasing whole. A common challenge is that the scene is too busy, with distracting elements that compete with the main subject. Your task as a photographer is to find a way to reduce the clutter so that your chosen theme can shine through.

The Composition Toolbox
The main tools you have to work with when composing a landscape photo are camera position and the focal length of the lens. Together, they determine what gets captured within the frame. Experimentation is vital. Set up in a promising spot and then try another, and another. Maybe zooming in will work. Or maybe a wide-angle lens is called for. Perhaps a vantage point on a hill will provide a compelling view. You get the idea.
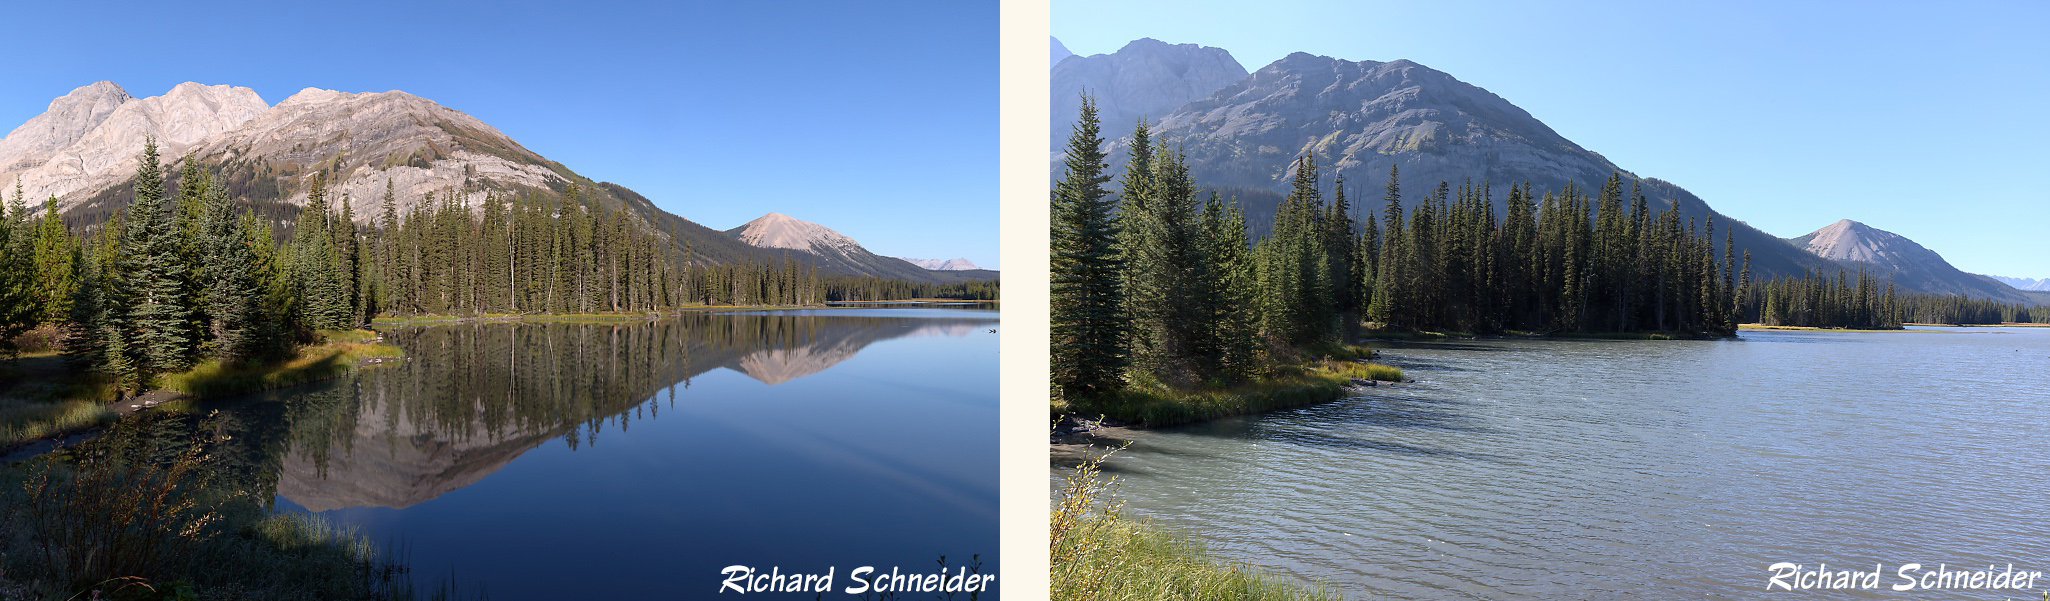
Composition bridges into the realm of art, so it is more subjective than the other topics we’ve covered. Nevertheless, there are many compositional strategies and tips that are known to work well (though not for every situation). One idea is to use natural lines to guide the viewer through the photo. Rivers and shorelines work well for this purpose, as shown in the adjacent photo.
Another important concept is balance. In its extreme form, this is expressed as symmetry, which works well for some scenes. For example, you might capture the reflection of an interesting subject in a pool of calm water (recall the lake photo from the previous section). More often, balance means ensuring that all of the elements work well together. Objects that are large, or bright, or have a strongly contrasting colour will tend to stand out. This doesn’t mean they have to be excluded, but you do need to consider their effect on the overall composition. There are no fixed rules here; it’s up to you to make a subjective, artistic decision about what works and what doesn’t.

The rule of thirds, which we discussed in the context of wildlife photos, also applies to landscape photos. Instead of always placing your main subject smack in the middle of the photo, try putting it a third of the way in from the left or right. This doesn’t work in every situation, but in many cases it creates a bit of visual tension that makes the photo stand out. The rule also applies in the horizontal dimension. For example, instead of putting the horizon in the centre, try putting it at the top or bottom third, depending on whether you want to emphasize the sky or the foreground. The photo of the Athabasca River at the top of this page provides a good example. Clouds play an important role in this photo, so a centre horizon would not have been the right choice.
When photographing distant landscapes, try to include something of interest in the foreground. Animals and plants are ideal for this purpose, as illustrated by the ground squirrel photo to the right. The combination of wildlife and beautiful scenery usually has much more appeal that either subject has on its own. Of course, you can't just order up an animal to walk into your scene on demand. But if you keep your eyes open you can often find something in the vicinity that will help add foreground interest.

Additional Strategies
There are many other strategies in the composition toolbox that apply in specific situations:
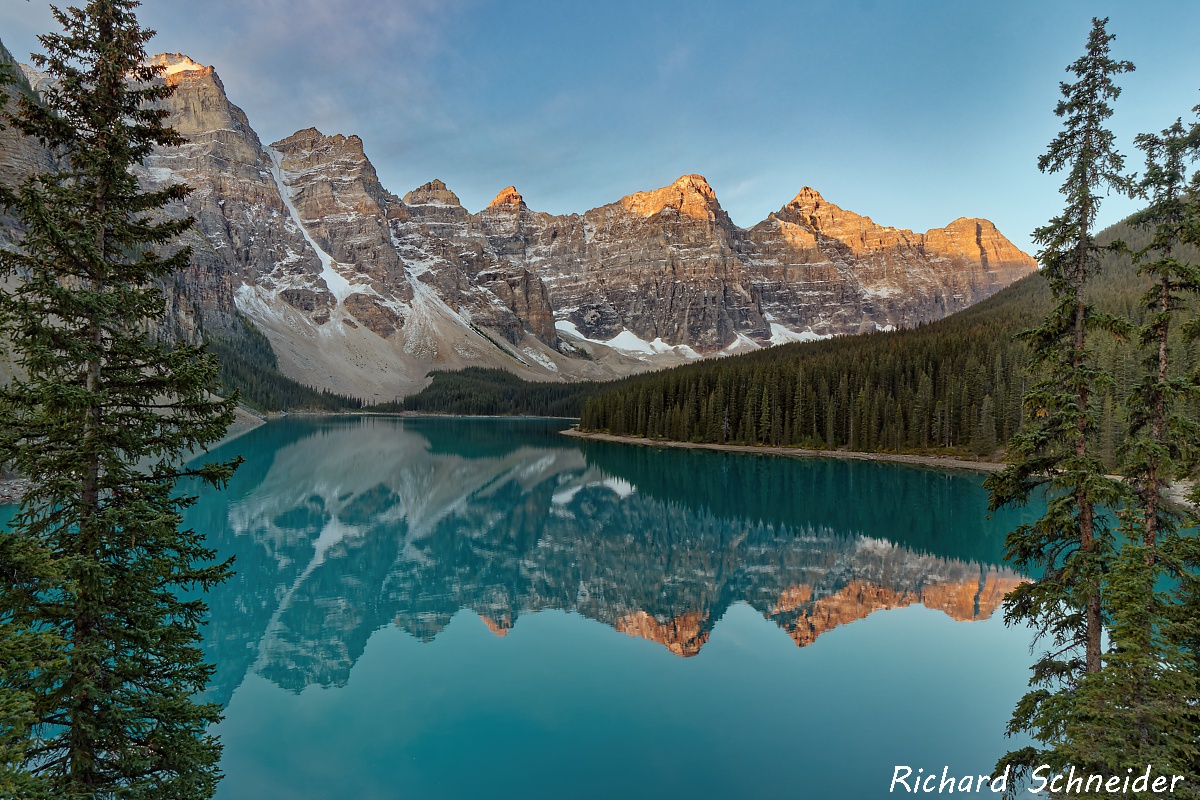
- Keep an eye out for foreground elements that can act as a natural frame for the photo. The photo of Moraine Lake shown in an earlier section provides an example (the tall trees on the left and right help to frame the lake).
- Ambient conditions, such as fog, storms, or soft, evening light, should be thought of as compositional elements. In many cases, they can make the difference between a good photo and an outstanding photo. You cannot manufacture these conditions, but you can certainly maximize your odds of finding them by taking the weather and lighting conditions into account when planning your outings.
- A common challenge with broad landscapes is that they are difficult to capture in their entirety, even with a wide-angle lens. A relatively easy solution is to take a panorama photo. To do this, shoot a sequence of photos while panning across the scene and overlapping each photo by at least a third. It is best to use a tripod and to set the camera to manual mode so that the exposure remains constant between photos. Once back home, the individual photos are easily stitched together using photo editing software. Microsoft has a free tool that works great for this.
- Don’t always shoot in horizontal orientation. Some scenes will work better if you flip your camera 90 degrees and shoot vertically, especially if there are strong vertical lines
- Try adding a polarizing filter if water or sky are a major element of your photo. The polarizer will cut through surface glare on water and enhance the colour of the sky.
- When composing the photo, remember to check that the horizon is level.