Wildlife: Field Tips
Finding Subjects
A great adage about achieving success in nature photography is “f/8 and be there.” In other words, great wildlife photos are more the result of time spent in the field than gear and camera settings. There is a lot of truth to this. Increased time in the field brings more opportunities to encounter (and photograph) interesting species and places. Moreover, spending time in nature is in large part what makes nature photography such a great hobby.
As a nature photographer, it's good practice to carry your camera with you whenever you go out in the field. The one time you leave your camera in the car is the time you will encounter something unique, guaranteed. That said, you should not rely on chance encounters with wildlife while out walking as your sole approach to wildlife photography. Chance encounters are often fleeting, making it difficult to think through and take your shot in time. You also have little or no control over the lighting or background.
An alternative to taking photos while on the move is the sit-and-wait approach. The idea is to pick a spot frequented by wildlife and then plant yourself there. Parks are a good choice because the animals there are less skittish around people. Apps like eBird and iNaturalist are excellent tools for locating specific species. Knowledge of the habitat needs of individual species can help in identifying high-use areas. A key benefit of the sit-and-wait approach is that you can optimize the background of your shots by preselecting the best spot to set up your camera. You can also time your visit to coincide with the best lighting conditions. By remaining still, and potentially using a blind, animals are less likely to be spooked by your presence. These steps will boost your odds of capturing something special.
Something else to keep in mind is that your telephoto lens is not only for photographing wildlife in the distance. It also works well for photographing subjects close at hand, such as insects and flowers. To photograph insects, pick a spot that is used frequently and wait for your subjects to arrive. This is usually easier than chasing them around the field. Maneuverability is key, so work handheld with a fast shutter speed (and lots of light). If your lens is not able to focus at short distances, this is easily remedied with an inexpensive extension tube that goes between your camera and lens.
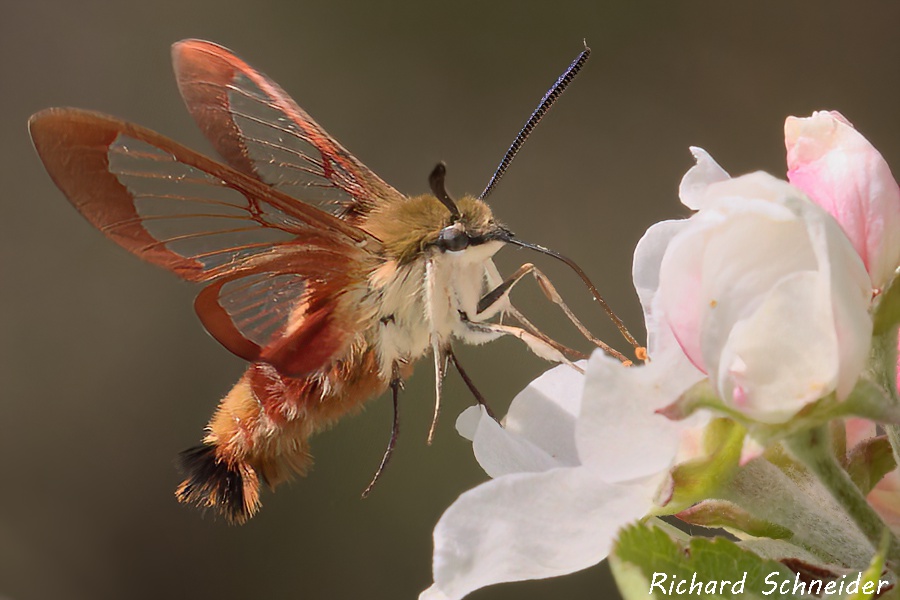
As an example, the adjacent photo of a hummingbird clearwing was taken with a 400 mm zoom lens at a subject distance of 1.5 metres. A shutter speed of 1/2000 sec. was used to freeze the wings and an aperture of f/18 was used to achieve an acceptable depth of field. The midday sun did not provide enough light for these settings, so the ISO had to be boosted to 8000. Dozens of shots were needed to obtain one that was sharp. Post-processing helped to deal with the noise from the high ISO.

Be Prepared
Another important factor in achieving success is knowing your camera well and being ready to shoot when the moment comes. The last thing you want to be doing when something special crosses your path is fumble around with your camera settings. Instead, lock in some default settings appropriate for the current conditions when you arrive in the field. If you encounter something interesting, fire off a couple of “safety” shots using your default settings to ensure you don’t walk away empty. Then you can relax a bit and think through the next steps. Begin by checking your initial photos to ensure that the exposure is acceptable and that the ISO is not through the roof. Adjust as needed and begin taking more photos. What is the background like? Are there distracting elements in the frame? Are you at eye-level with the subject? Can you move your position to improve the shot? If time permits, you can try different aperture settings to achieve the optimal balance between subject sharpness and a nicely blurred background. If the ISO is high, you might try some shots with a slower shutter speed. Most of these will have poor sharpness due to motion blur, but if you take many shots, some are bound to work out.
Last but not least, ensure that you are minimizing your impact on your subjects and the local environment. Nature faces threats from far too many sources; the last thing you want to do is become part of the problem.
